The Straight-Bar Method
By Calzature Marche · 28 May 2026 · 8 Min Read · CareGet Free Cheat SheetStraight-Bar Lacing Instructions
Lacing is a small detail that can completely change the look and feel of a dress shoe. The same pair of Oxfords can appear more formal or more relaxed depending on how the laces are threaded, while also affecting fit and comfort. There’s no single correct method—just several classic techniques, each suited to different styles and occasions. Below, you'll find the six most common options and when to use them. For a quick overview, grab the free cheat sheet with all six methods on one printable page→.
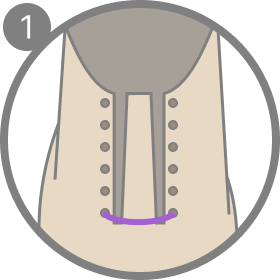
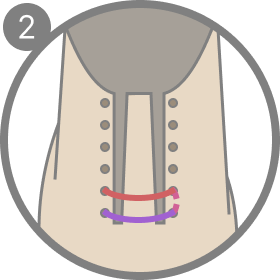
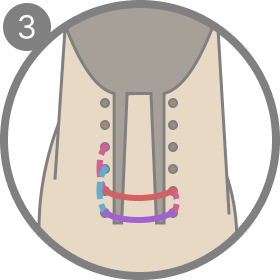
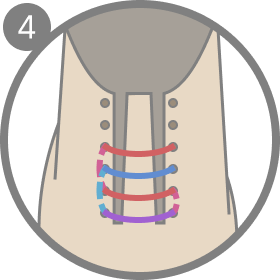
Nailed the clean straight-bar look and want to explore more? Download our free Shoe Lacing Techniques Cheat Sheet — a printable, one-page guide covering all 6 step-by-step ways to lace dress shoes, so you can keep every method right by your closet. Install your free cheat sheet here.
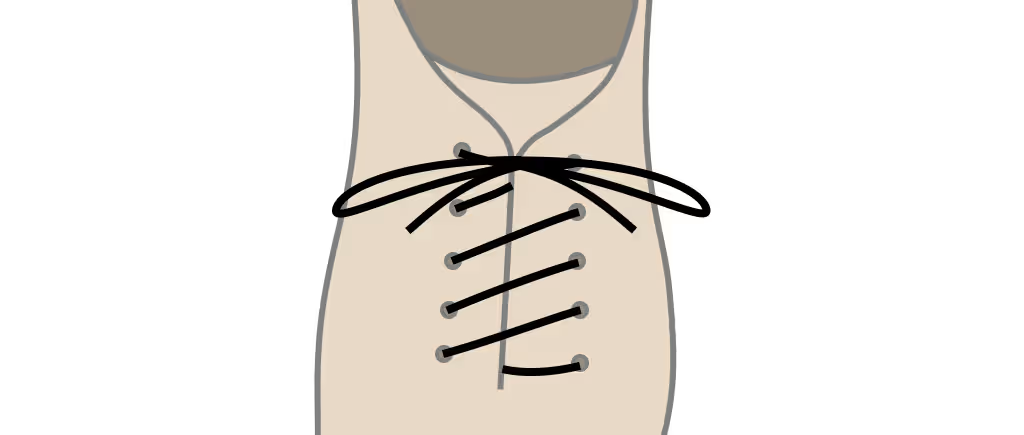
The Criss-Cross Method
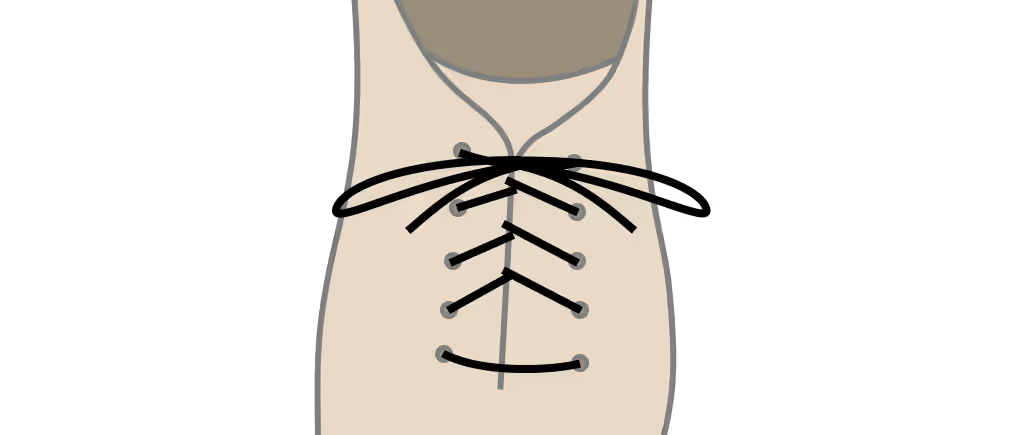
A step-by-step guide to criss-cross lacing—the most versatile, everyday way to lace Oxfords and Derbies, with the laces crossing neatly between each pair of eyelets.
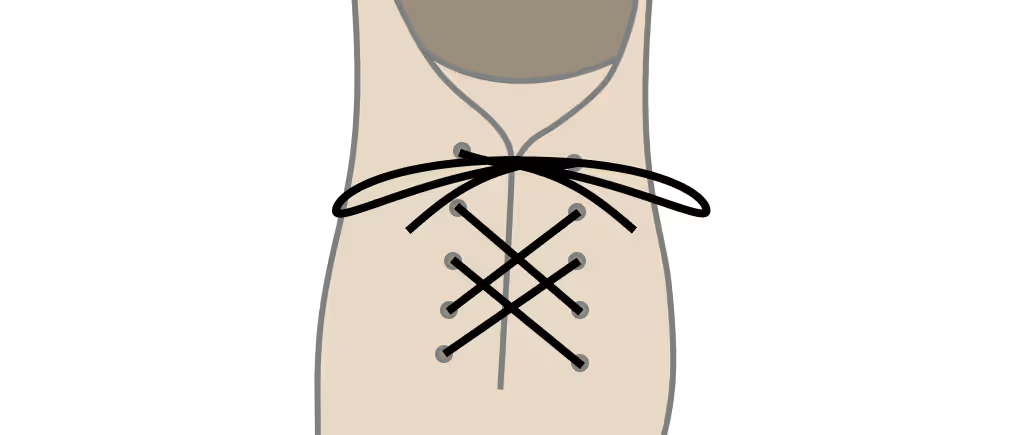
The Diagonal Method
A step-by-step guide to diagonal lacing—a distinctive, asymmetric pattern that sends the laces across the eyelets at a single clean angle for a modern look.
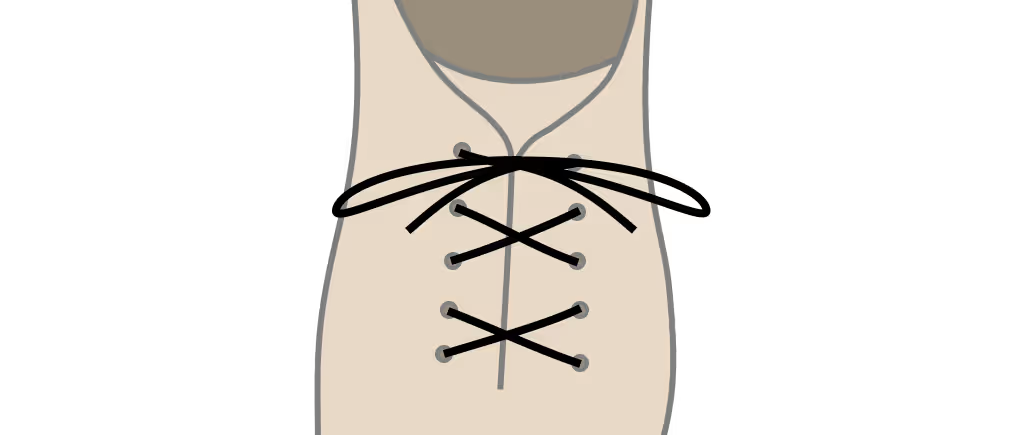
The Lattice Method
A step-by-step guide to lattice lacing—a decorative woven pattern that interlaces the laces into a basket-weave for a striking, statement finish.
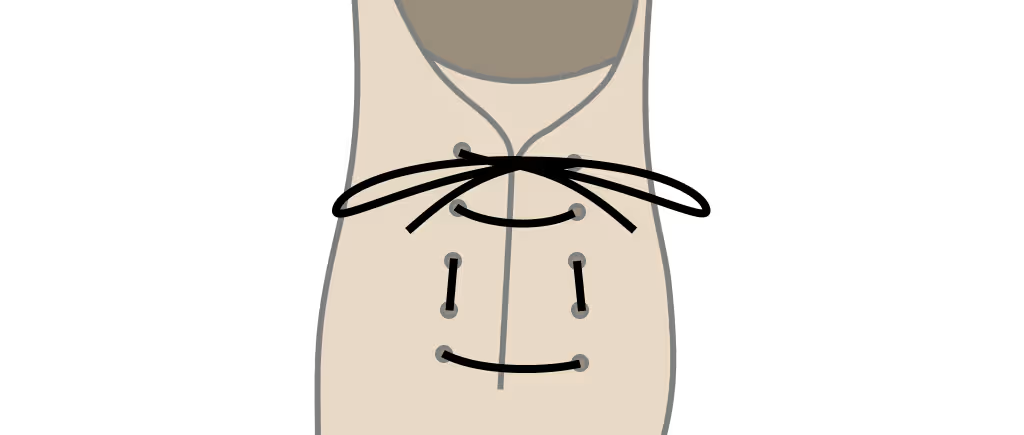
The Over-Under Method
A step-by-step guide to over-under lacing—an efficient, low-friction pattern that alternates over and under the eyelets for a snug fit that stays tied.
The Vice-Versa Method
A step-by-step guide to vice-versa lacing—a balanced, reversible variation on the criss-cross that keeps both ends even and the front lying perfectly flat.
Why Straight-Bar Is the Most Formal
Straight-bar lacing — also called ladder lacing — is the dressiest of the six, and the reason is pure geometry. Every lace runs straight across the eyelets in clean, parallel horizontal bars, while the vertical runs that connect them are tucked away on the inside, hidden from view. The front of the shoe shows nothing but a tidy ladder of bars and not a single diagonal crossing the tongue. That restraint is exactly what makes it formal: where criss-cross and the others draw the eye with crossing lines, straight-bar gives the cleanest, most minimal face a laced shoe can have. On a polished black Oxford it looks deliberate and sharp, the lacing equivalent of a well-pressed collar. It's the natural choice when you want the shoe to read as quietly, unmistakably correct.
When to Reach for It
Straight-bar belongs to the most formal end of the wardrobe. It's the lacing for black tie, weddings, funerals, formal business, and any occasion where an Oxford is the right shoe and understatement is the goal. It pairs best with closed-lacing Oxfords, whose snug, sewn-down flaps suit the flat, symmetrical look; on an open-laced Derby the same pattern works but flatters the construction less, since the flaps want to splay outward rather than sit flat. Save it for sleek, minimal shoes — a plain or cap-toe Oxford in a dark, polished leather — where the clean bars can do their work. For everyday wear, criss-cross is easier to live with; straight-bar is what you reach for when the occasion asks the shoe to look its most refined.
How Eyelet Count Changes Straight-Bar
Straight-bar is the fussiest of the six about eyelet count, and the reason is parity. The pattern relies on every diagonal connecting run staying hidden inside, and that only resolves perfectly with an even number of eyelet pairs — four or six. On an even count, every bar lies clean on the surface and nothing diagonal shows. On an odd count — three or five pairs — the maths doesn't close, and you're left with one diagonal visible somewhere on the shoe. It's a small flaw, but an obvious one against such a clean pattern. With odd eyelets you have three choices: accept the single diagonal, hide it as low on the shoe as possible where it's least noticeable, or switch to criss-cross or vice-versa for that pair. Beyond parity, the count also affects formality: more bars read as more refined, so a six-eyelet Oxford carries the ladder effect better than a sparse two- or three-eyelet shoe, where only a couple of bars have room to form. Count your eyelets before committing to straight-bar — especially before a formal event, where a stray diagonal discovered at the last minute means a frustrating re-lace.
Getting the Finish Right
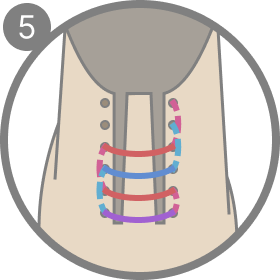
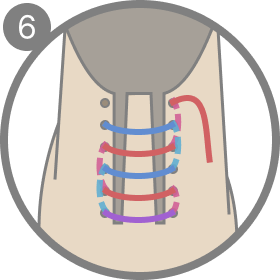
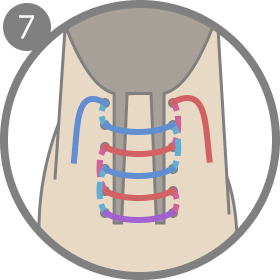
Straight-bar rewards precision, so take your time. Begin by threading the lace straight across the outside at the bottom eyelets, then feed both ends straight up on the inside to the next row and across the outside again, repeating all the way to the top. The goal is that every horizontal bar lies clean and visible on the surface while every vertical run stays hidden inside. Keep the laces flat and untwisted — a twist in a bar is glaringly obvious against such a clean pattern. Aim for even spacing so the bars look like rungs of equal length and height. Because the vertical runs are concealed inside the shoe, straight-bar is a little harder to tighten and loosen than a crossing pattern, so adjust the tension gently as you build it rather than yanking at the finished lacing. Centre the bow and match the ends, and the result should look machine-precise.
Choosing the Right Lace
For a pattern this clean, the lace is unforgiving of the wrong choice. Thin, flat, waxed laces are almost mandatory here: they lie perfectly flat across each bar, hold a crisp edge, and read at their most formal — exactly what straight-bar is for. Round or chunky laces are the one thing to avoid, since their bulk rounds off the bars, casts shadows, and softens the sharp, minimal look that is the entire point of the method. Stick to a colour that matches or closely tones with the leather; contrast and novelty belong on relaxed patterns, not this one. Length is similar to criss-cross, so no need to size up — a typical five-to-six-eyelet dress shoe takes around a 27–30 inch lace.
Common Mistakes to Avoid
The mistakes here are all the more visible because the pattern is so clean. Attempting it on an odd number of eyelet pairs and being surprised by the stray diagonal is the most common — count first. Twisted laces show instantly against the flat bars, so flatten each one as you go. Uneven tension makes the bars bow or sag rather than sitting as crisp parallel rungs. Using a round or thick lace blunts the minimal effect no matter how neatly you thread it. And reaching for straight-bar on a casual or heavily decorated shoe wastes its formality on the wrong setting. Avoid these and the pattern looks effortlessly sharp.
Frequently Asked Questions
What's the difference between straight-bar and ladder lacing? They're two names for the same method — clean horizontal bars on the surface with the vertical runs hidden inside. Some also call it straight or bar lacing.
Does it work on an odd number of eyelets? Not perfectly. Straight-bar resolves cleanly only with an even number of eyelet pairs; an odd number leaves one diagonal showing. With odd eyelets, hide that diagonal low or choose another method.
Is it suitable for Derbies? You can use it, but it suits closed-lacing Oxfords best. On an open-laced Derby the flaps want to splay rather than sit flat, so the pattern flatters the shoe less.
Why is it harder to tighten? The vertical runs are hidden inside the shoe, so there's less to pull on than with a crossing pattern. Adjust the tension gently as you build it rather than tightening the finished lacing.
The sharpest lacing deserves the sharpest shoe. Explore our handcrafted Oxfords, Derbies, and loafers at Calzature Marche.
— Calzature Marche · Marche, Italia
Filed under Care · 28 May 2026