The Over-Under Method
By Calzature Marche · 28 May 2026 · 9 Min Read · CareGet Free Cheat SheetOver-Under Lacing Instructions
Lacing is a small detail that can completely change the look and feel of a dress shoe. The same pair of Oxfords can appear more formal or more relaxed depending on how the laces are threaded, while also affecting fit and comfort. There’s no single correct method—just several classic techniques, each suited to different styles and occasions. Below, you'll find the six most common options and when to use them. For a quick overview, grab the free cheat sheet with all six methods on one printable page→.
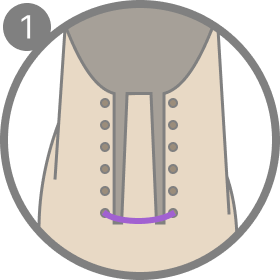
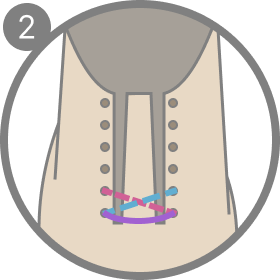
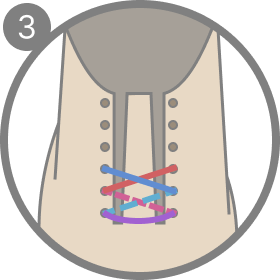
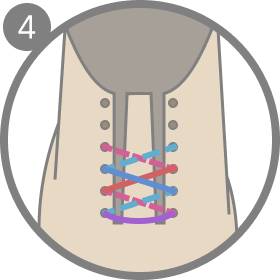
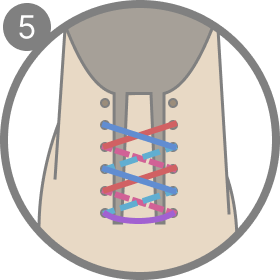
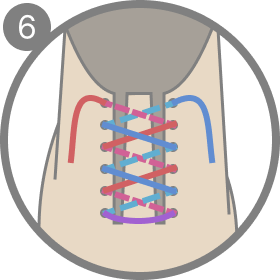
Got the over-under method down and ready for the next? Download our free Shoe Lacing Techniques Cheat Sheet — a printable, one-page guide covering all 6 step-by-step ways to lace dress shoes, so you can keep every method right by your closet. Install your free cheat sheet here.
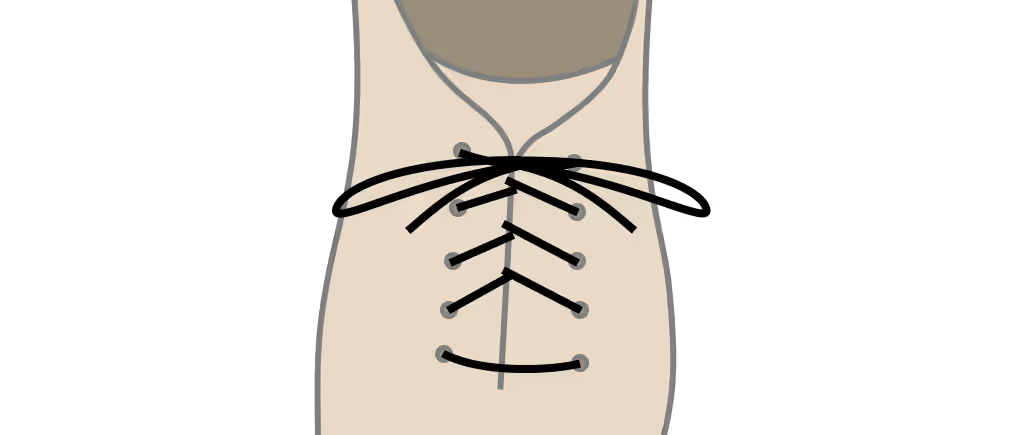
The Criss-Cross Method
A step-by-step guide to criss-cross lacing—the most versatile, everyday way to lace Oxfords and Derbies, with the laces crossing neatly between each pair of eyelets.
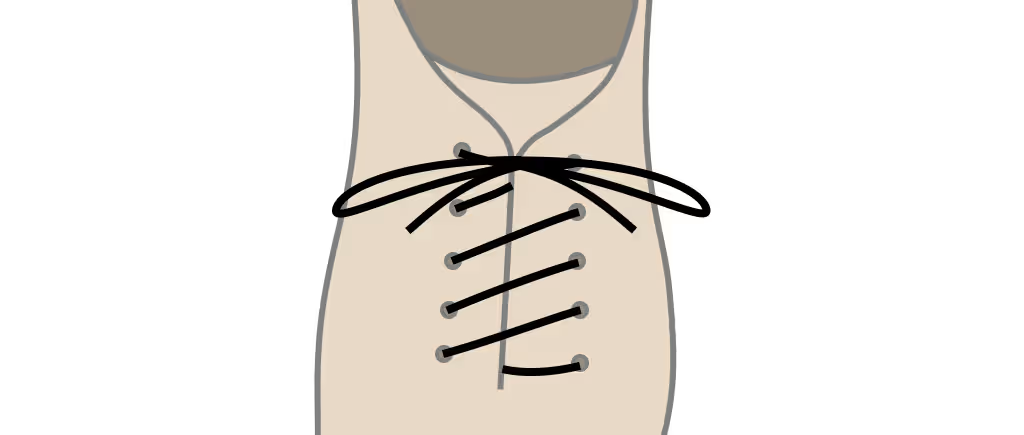
The Diagonal Method
A step-by-step guide to diagonal lacing—a distinctive, asymmetric pattern that sends the laces across the eyelets at a single clean angle for a modern look.
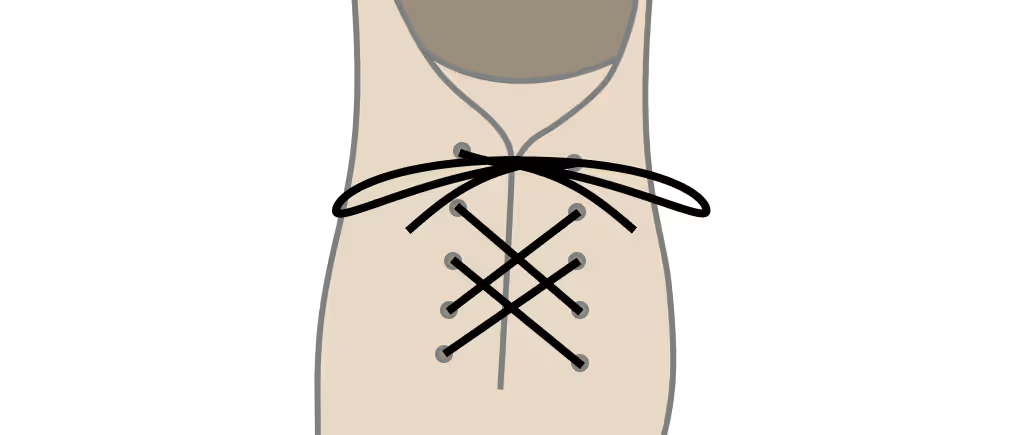
The Lattice Method
A step-by-step guide to lattice lacing—a decorative woven pattern that interlaces the laces into a basket-weave for a striking, statement finish.
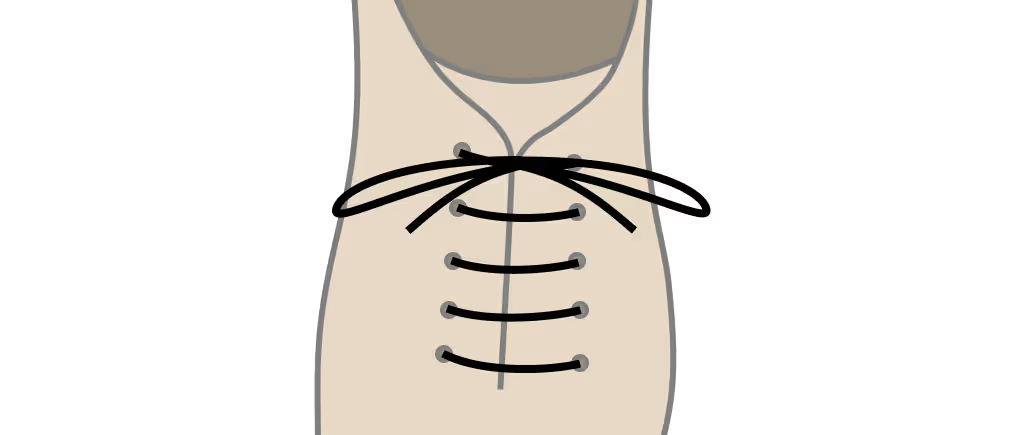
The Straight-Bar Method
A step-by-step guide to straight-bar (ladder) lacing—the clean, parallel look favoured for formal Oxfords, where each lace runs straight across the eyelets.
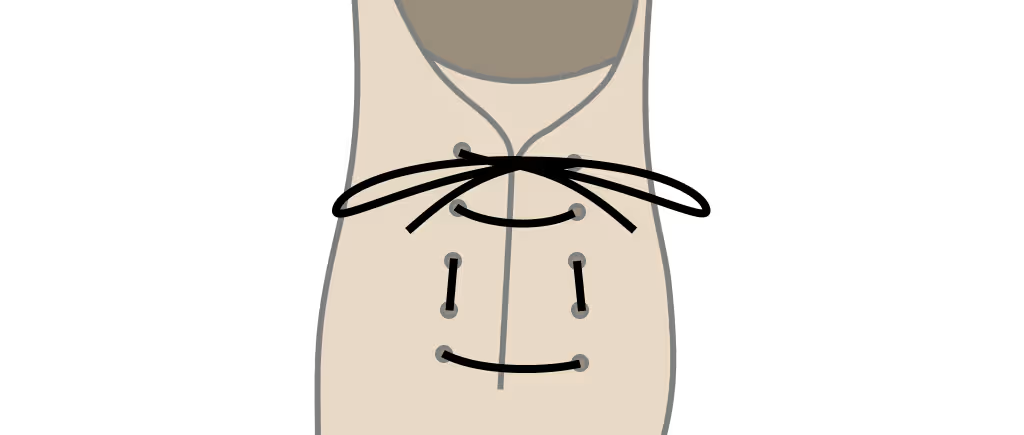
The Vice-Versa Method
A step-by-step guide to vice-versa lacing—a balanced, reversible variation on the criss-cross that keeps both ends even and the front lying perfectly flat.
Why Over-Under Is the Comfort Choice
Over-under is the quiet problem-solver of the six. From the outside it looks almost identical to a standard criss-cross — the same neat, traditional crossings — so it gives nothing away. The difference is entirely in the feel. By alternating each lace over one eyelet and then under the next, the pattern cuts down the friction that builds where laces drag against each other and against the eyelets. That single change has a cascade of benefits: the shoe cinches more evenly, the laces glide rather than catch, pressure spreads more consistently across the whole foot, and the knot holds longer because the tension is distributed instead of concentrated. If a shoe has never felt quite right and you've blamed the fit, over-under is the first thing to try — it solves more "fit" complaints than people expect, and it costs nothing but a re-lace.
When to Reach for It
Because it looks conventional, over-under fits in almost anywhere a criss-cross would, which makes it an easy everyday upgrade rather than a special-occasion choice. Reach for it on long days when your feet swell, on stiff new leather that hasn't broken in, and on any shoe that feels like it's pinching or loosening as you wear it. It's especially worth knowing for travel, standing work, and anything that keeps you on your feet for hours. Where its cousin diagonal targets instep pressure specifically and looks deliberately different, over-under spreads comfort evenly across the entire foot while staying visually traditional — so if you want the benefit without changing how the shoe looks, this is the method to choose. It suits Oxfords and Derbies equally well, and reads as appropriate in formal and casual settings alike.
How Eyelet Count Changes Over-Under
Eyelet count matters for over-under in one specific way: it decides where you start. To finish with an "over" crossing at the top — the tidy result you want — thread the bottom row across the outside if the shoe has an even number of eyelet pairs, or across the inside if it has an odd number. Get the start side right and the alternation lands cleanly at the top; get it wrong and the pattern finishes on an awkward "under." Beyond that, the count simply changes how many alternations you work — more eyelets mean more over-under repeats, and a touch more of the friction-reducing benefit, since there are more low-friction "under" crossings helping the lace glide. The look stays the same conventional criss-cross face regardless of count, which is the whole appeal. Whatever the number, hold the alternation strictly; losing your place is easier on a tall, many-eyelet shoe.
How the Low-Friction Design Works
The mechanics are simpler than the benefits suggest. In a standard criss-cross, every crossing presses the laces against the eyelets and against each other, so each section grips the next; tightening one part tugs against the friction of all the others. Over-under breaks that chain. By passing under at every second crossing, the lace has far fewer points where it binds, so it slides freely when you pull it. The practical upshot is twofold. First, the shoe tightens more evenly, because tension travels along the lace instead of getting stuck at each crossover. Second — and this is the trick most people miss — you only need to pull the outer (over) crossovers to snug the whole shoe, since the under crossings glide along behind them. Less friction also means less working-loose over the day, which is why over-under stays tied when a slippery criss-cross gives up.
Getting the Finish Right
A clean over-under starts with the right side. Thread the lace straight across the bottom eyelets on the outside if your shoe has an even number of eyelet pairs, or on the inside if it has an odd number — this small detail keeps the pattern landing correctly at the top. From there, work upward and hold the alternation strictly: over at one pair, under at the next, all the way up, without losing your place. Keep the laces flat and untwisted so the over crossings sit as cleanly as a normal criss-cross from the outside. When you tighten, work from the bottom up and pull mainly on the outer crossovers, letting the under sections glide to even out the tension. Finish with a centered bow and matched lace ends. Done right, no one can tell it apart from a standard lacing — until they wear it.
Choosing the Right Lace
The low-friction benefit is partly the pattern and partly the lace, so the two work together. Thin, flat, waxed laces glide best through the over-under crossings and read most formal on a dress shoe, which makes them the natural match. The waxed finish also helps the knot hold, reinforcing the method's stay-tied advantage. Rounder or chunkier laces create more friction and partly undo the gliding effect, besides leaning casual, so they're better kept for boots and sneakers. Match the length to your eyelet count as you would for criss-cross — over-under uses roughly the same amount of lace, so no need to size up here. A typical five-to-six-eyelet dress shoe takes around a 27–30 inch lace.
Common Mistakes to Avoid
The errors are small but they cost you the benefit. Losing track of the alternation — going over twice in a row, or under twice — breaks the low-friction rhythm and shows as an uneven crossing on the surface. Starting on the wrong side for your eyelet count leaves the pattern finishing awkwardly at the top. Tightening by yanking every crossing, rather than pulling the outer ones and letting the rest glide, fights the very friction reduction you laced for. And letting the laces twist spoils the clean, conventional look that is half the appeal. None of these is hard to avoid: pick the right starting side, hold the over-under rhythm, keep the lace flat, and tighten the outer crossovers.
Frequently Asked Questions
Does over-under really make a shoe more comfortable? Yes. By reducing friction at the crossings, it lets the shoe tighten evenly and spreads pressure across the foot, which often resolves discomfort people wrongly blame on the fit.
Does it look different from normal lacing? Barely. From the outside it's almost indistinguishable from a standard criss-cross, so you get the comfort benefit without changing the shoe's appearance.
Should I start on the inside or the outside? Start across the outside if you have an even number of eyelet pairs, and across the inside if you have an odd number, so the pattern lands cleanly at the top.
Will it stay tied better than criss-cross? Generally yes. Lower friction and more even tension mean the knot is less likely to work loose over a long day, especially with flat, waxed laces.
Comfort and craft belong together. Explore our handcrafted Oxfords, Derbies, and loafers at Calzature Marche.
— Calzature Marche · Marche, Italia
Filed under Care · 28 May 2026