The Diagonal Method
By Calzature Marche · 28 May 2026 · 9 Min Read · CareGet Free Cheat SheetDiagonal Lacing Instructions
Lacing is a small detail that can completely change the look and feel of a dress shoe. The same pair of Oxfords can appear more formal or more relaxed depending on how the laces are threaded, while also affecting fit and comfort. There’s no single correct method—just several classic techniques, each suited to different styles and occasions. Below, you'll find the six most common options and when to use them. For a quick overview, grab the free cheat sheet with all six methods on one printable page→.
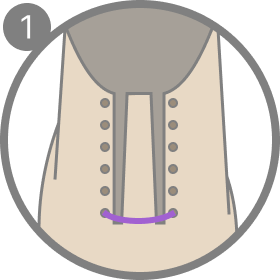
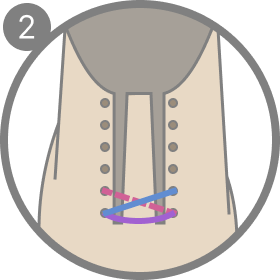
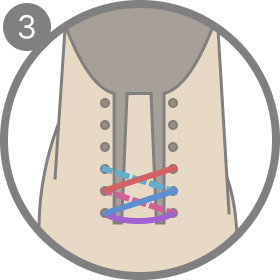
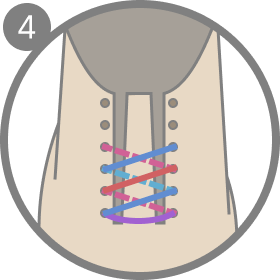
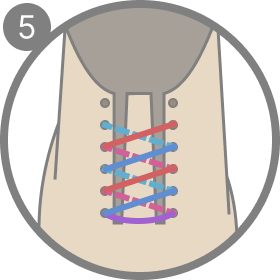
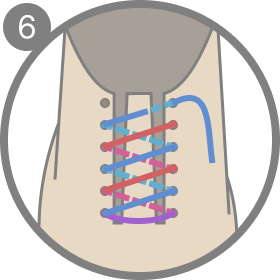
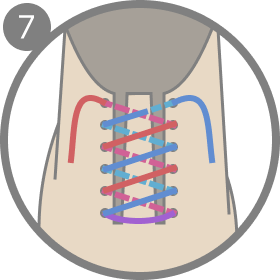
Loved the diagonal look and want to try the rest? Download our free Shoe Lacing Techniques Cheat Sheet — a printable, one-page guide covering all 6 step-by-step ways to lace dress shoes, so you can switch styles in seconds. Install your free cheat sheet here.
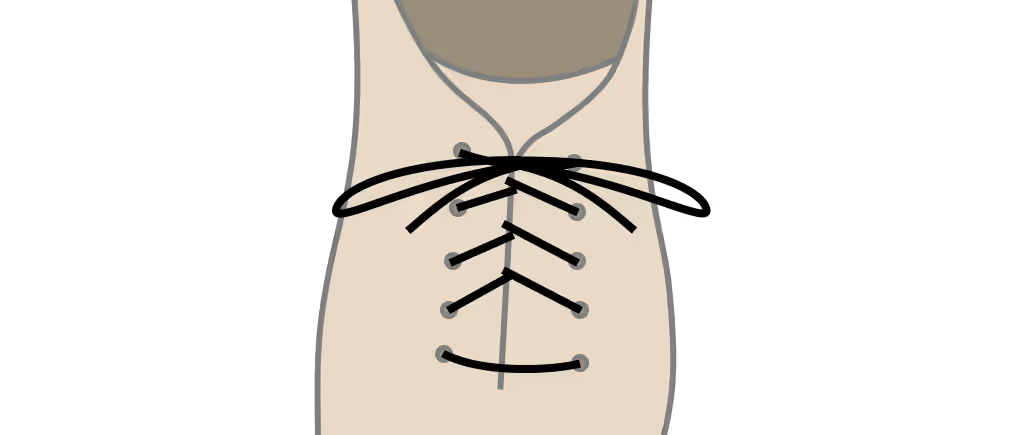
The Criss-Cross Method
A step-by-step guide to criss-cross lacing—the most versatile, everyday way to lace Oxfords and Derbies, with the laces crossing neatly between each pair of eyelets.
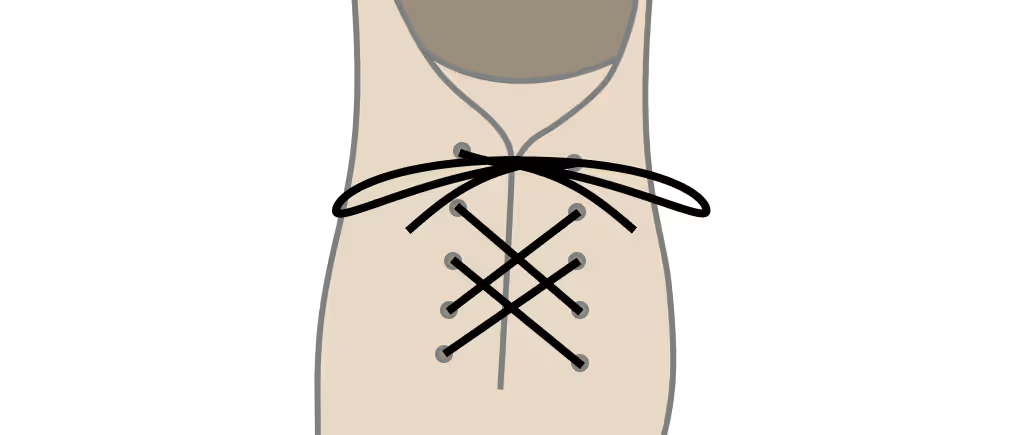
The Lattice Method
A step-by-step guide to lattice lacing—a decorative woven pattern that interlaces the laces into a basket-weave for a striking, statement finish.
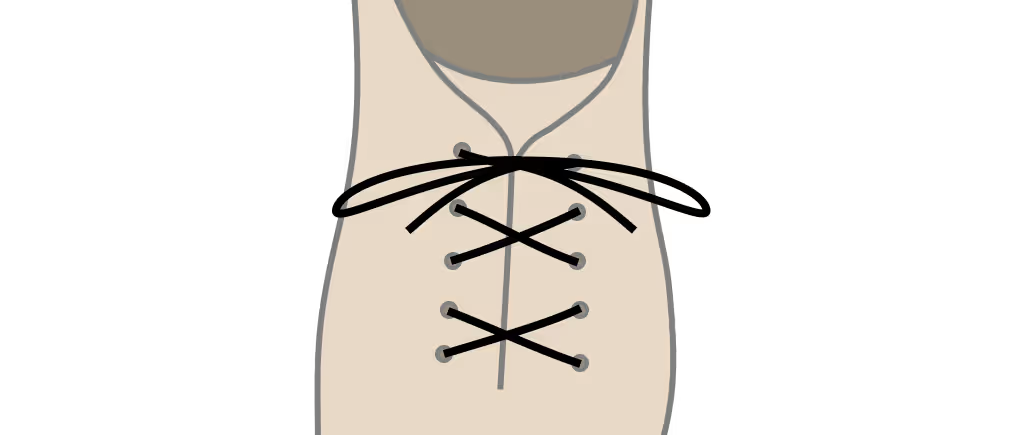
The Over-Under Method
A step-by-step guide to over-under lacing—an efficient, low-friction pattern that alternates over and under the eyelets for a snug fit that stays tied.
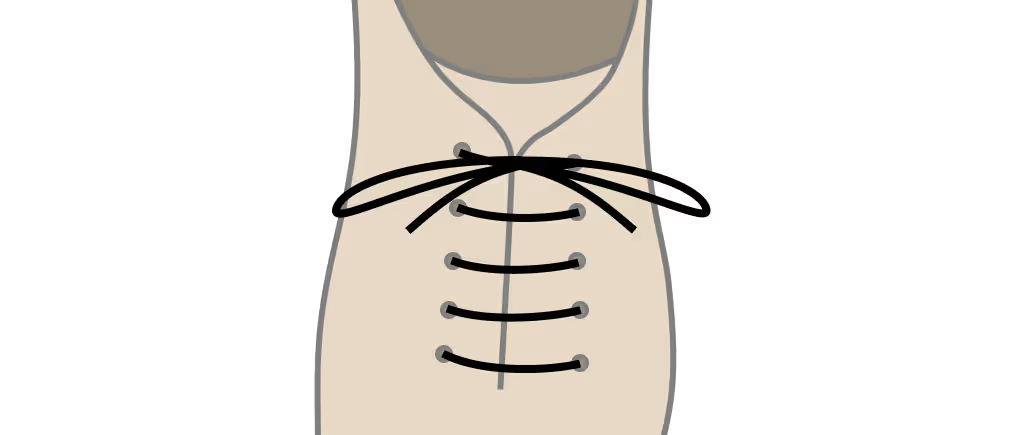
The Straight-Bar Method
A step-by-step guide to straight-bar (ladder) lacing—the clean, parallel look favoured for formal Oxfords, where each lace runs straight across the eyelets.
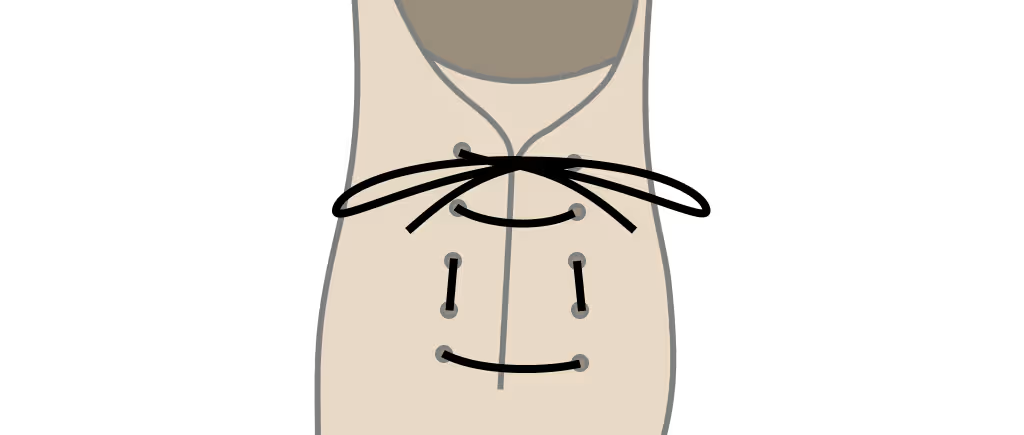
The Vice-Versa Method
A step-by-step guide to vice-versa lacing—a balanced, reversible variation on the criss-cross that keeps both ends even and the front lying perfectly flat.
Why Diagonal Lacing Stands Out
Most lacing patterns are symmetrical by design; diagonal is the one that deliberately isn't. By sending the laces across the eyelets at a single consistent angle — and skipping the straight crossovers entirely — it draws one clean line across the vamp instead of the usual mirrored X's. The result reads modern and intentional, a quiet departure from the default that rewards a second look without shouting for attention. But the pattern is more than a styling choice. Because so few lace segments rest on top of the foot, diagonal lacing also relieves pressure across the instep, which makes it a practical answer to a common complaint as much as a contemporary one. Few methods manage to be both a look and a fix at the same time; this is one of them, and that dual nature is exactly why it's worth knowing.
When to Reach for It
Diagonal lacing works best on a plain, uncluttered shoe where the single angled line has room to register — a clean cap-toe Oxford or an unadorned Derby rather than a heavily brogued or busy upper. It leans a touch less formal than a strict criss-cross or straight-bar, so it's most at home in smart-casual and creative-professional settings, where a small, deliberate detail is an asset rather than a distraction. It's also the method to reach for the moment a shoe pinches across the top of the foot: if the instep feels compressed in a conventional lacing, switching to diagonal often relieves it immediately. In short, choose it when you want a modern edge, more room over the instep, or — ideally — both of those at once.
How Eyelet Count Changes the Diagonal
Diagonal lacing works on any eyelet count, with no parity rule, but the count strongly affects how the line reads. The pattern's whole appeal is one clean, continuous angle running up the shoe — and that needs height to register. On a tall five-, six-, or seven-eyelet shoe, the diagonal draws a long, confident line that's unmistakably intentional. On a low two- or three-eyelet shoe, there simply isn't enough rise for the line to develop, so the effect looks more like a stray angle than a deliberate design. If you want the diagonal to make its statement, favour a higher-eyelet shoe. The instep-relief benefit holds at any count, since the principle — keeping lace off the top of the foot — doesn't depend on height; but visually, more eyelets give the pattern the room it needs to look its best.
The Comfort Angle: Relieving Instep Pressure
The instep is where most lacing discomfort lives. Conventional patterns lay several crossing segments directly over the top of the foot, and on a high or sensitive instep those segments press down and bite with every step. Diagonal lacing sidesteps the problem by routing the lace up one continuous angled path rather than stacking crossings over the vamp, so far less of the lace ever touches the top of the foot. The pressure that does remain is spread along the line rather than concentrated at each crossover point. For anyone who has assumed a shoe simply runs too shallow over the instep, it's worth trying diagonal before writing the pair off — the relief is often immediate, and it costs nothing but a re-lace. It's the same principle behind dedicated pressure-relief lacing, achieved with a pattern that also happens to look good on the shelf.
Getting the Finish Right
A diagonal lace lives or dies by the cleanness of its line, so the details matter. Start by threading straight across the outside at the bottom and in through the lowest eyelets, then commit to a single, consistent angle as you climb — the eye immediately catches any segment that wanders off the line. Keep the lace flat and untwisted between eyelets; a twist throws a small shadow that breaks the otherwise smooth diagonal. Because the pattern is asymmetric by nature, you won't be matching left to right as you would with criss-cross; instead, aim for one unbroken, evenly angled run from bottom to top. Snug the lace gently as you go rather than cinching hard, since over-tightening defeats the very instep relief that makes the method worthwhile. Finish with a tidy bow that doesn't fight the line below it.
Choosing the Right Lace
Because diagonal lacing is partly a visual statement, the lace you choose does real work. Thin, flat, waxed laces read most formal and lie cleanest along the angle, holding the line crisp across the vamp. If you want the diagonal to genuinely stand out, a subtly contrasting lace colour will trace the line clearly — though keep it restrained on a dress shoe, where too much contrast tips from intentional into novelty. Rounder or chunkier laces lean casual and soften the effect, which can suit a relaxed shoe but blurs the clean geometry the method depends on. As with any pattern, match the length to your eyelet count and size up if in doubt; a typical five-to-six-eyelet dress shoe takes roughly a 27–30 inch lace, though a long continuous diagonal can call for a touch more.
Common Mistakes to Avoid
The errors here are mostly errors of line. Letting the angle drift — steeper at the bottom, shallower toward the top — robs the pattern of the clean consistency that makes it look deliberate rather than accidental. Allowing the lace to twist between eyelets breaks the smooth run with little shadows. Over-tightening cancels the instep relief that is half the point of choosing diagonal in the first place. And attempting it on a busy, heavily decorated upper buries the single line in visual noise, so the effort goes unseen. Each is easy to avoid: pick a plain shoe, hold one steady angle, keep the lace flat, and resist the urge to crank it tight.
Frequently Asked Questions
Is diagonal lacing good for a high instep? Yes — it's one of the best choices for it. By keeping most of the lace off the top of the foot, it relieves the pressure that conventional crossings place on a high or sensitive instep.
Is it formal enough for a dress shoe? It suits smart-casual and creative-professional settings more than black tie. For the most formal occasions, straight-bar or criss-cross remains the safer call.
What shoe suits it best? A plain, clean upper — a simple cap-toe Oxford or an unadorned Derby — where the single angled line has room to register without competing with brogueing or other detail.
Will it stay tied as well as criss-cross? It holds well with flat, waxed laces. Because there are fewer crossings gripping the lace, a slightly thicker or waxed lace plus a double knot help it stay put through the day.
Ready to put a clean diagonal to good use? Explore our handcrafted Oxfords, Derbies, and loafers at Calzature Marche.
— Calzature Marche · Marche, Italia
Filed under Care · 28 May 2026